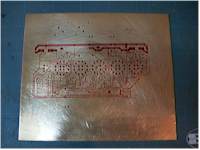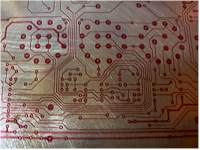
OK, so I want to make my own PCBs, but I don't want the hassle and expense of buying photo-resist copper clad board, exposing, developing etc. I found some information on the Internet about using flatbed X-Y plotters to draw the tracks directly onto plain copper board using etch resistant pens so I decided to try it myself. Here is what I found.
Well, first job, find a plotter. I got hold of a Roland DXY-1100 A3 flatbed plotter off the Internet. I don't think I'll make PCBs any larger than A3 size. This plotter uses the standard HPGL plotter language, so it should work with most CAD software. For PCB design programs I tried a commercial Windows package, Protel 98 and also Eagle, which has a freeware and Linux version available. Protel 98 is waaay too complex, there's a gazillion options and I couldn't figure out how to work the autorouter. Eagle on the other hand, seems a bit simpler, and it didn't take me long to work out how to draw a schematic, make it autoroute and dump to an HPGL file. Just what I need.
To make the plotter plot the contents of
the HPGL file, I do not use the Windows Roland drivers, but I simply
dump the file to the parallel port in DOS. You just need to do this:
type whatever.hpgl > LPT1:
If you are using Linux then I think
something like this will work:
cat whatever.hpgl > /dev/lp0
So, now I know I can make the plotter draw a schematic onto paper, I need to replace the paper with some copper clad board. But the pens that I got with the potter all use water-based ink, which doesn't stick to copper, and isn't etch resistant. I found many threads on google about what is the best pen to use for this task, and the general opinion seems to be the Staedtler Lumocolor permanent red OHP pen. Well it just so happens I have one of these pens (although it is a black one) so I can try it for myself. Apparently these are available in different tip widths 0.3 and 0.8mm, maybe others too. So how do stick this pen in my plotter? Well there is no height restriction on the DXY-1100 so I try drilling out an old plotter pen and inserting the Staedtler pen into it's body. Seems a bit crappy, the pen keeps falling out, I couldn't drill the hole perfectly straight and I don't like it. So, bit more searching the ol' Internet and someone suggests simply replacing the inked felt from inside a plotter pen with a cut down length from inside the Staedtler pen. What a genius! Check out the text here.
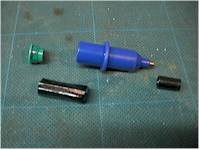
Plotter pen in bits. (Disposable fibre tip pen)
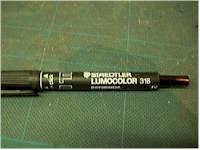
Staedtler pen about to donate it's guts in the name of science. You can see the felt sticking out the end.
The Staedtler pen has 'refillable' printed on the body. I assumed this meant it would be easy to extract and replace its insides, but the end-cap seems to be part of the pen itself and doesn't come off. How you're supposed to refill I'll never know, so I had to resort to the trusty hacksaw.
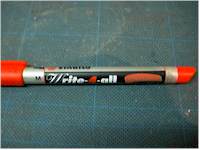
After I chopped it up, I found another permanent pen, where the end does unscrew. So I converted a plotter pen using this ink too, to see if this is also etch resistant. It's called a Write-4-All, advertised as being able to write on any surface.
After running a couple of test plots to let the new ink flow through (try out DISNEY.HPGL) its time to plot onto copper.
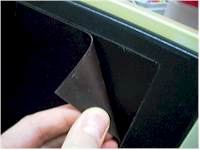
I want to use standard 1.6mm copper board, but after sticking a piece to the plotter bed I found that the bottom of the pen holder/solenoid does not have the necessary clearance and hits the board. The bed is magnetic, designed to hold down plotter paper in conjunction with thin metal strips, which is actually just an adhesive sheet so I removed it simply by peeling it off:
